I am not going to hold you in any suspense at all… The one app you NEED for your business NOW is:
Buffer.
You may already be using it, and if so, bravo! Skim the rest of this article and you might still learn something 🙂 If you’re not already using Buffer, and you have a business that uses any type of social media [which, let’s be honest, should be EVERY business] then you NEED Buffer and you need it now.
I was a Hootsuite user, which I could never really get into and which, to be honest, turned me off of social media scheduling tools all together. I peaked at Edgar [which is good for recycling the same content over and over] but it wasn’t until I attended New Media Europe recently and sought out to learn about Buffer that I finally gave in and tried it.
It is so so so so simple to get setup and just start scheduling content for social. It has built-in analytics and a very pleasing user experience – I am generally a ‘show me how to do it’ person but I found it a breeze to get going. The only two stipulations are:
- You’ll need to do the bulk of your scheduling on your computer, not your phone.
- When you setup Buffer for the first time, use Google Chrome. You’ll see why later on.
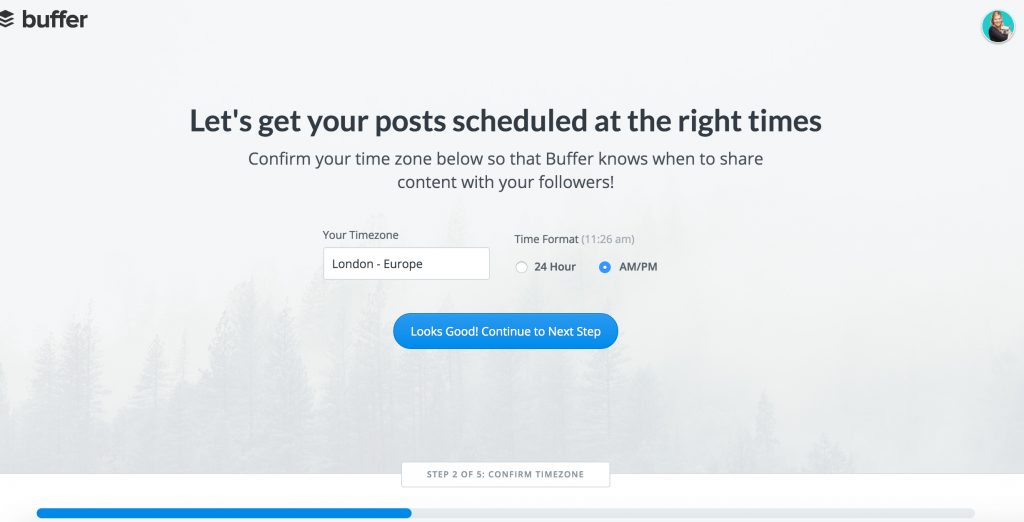
One of the first things you’ll be prompted to do, is select a time-zone. Be sure you select the timezone your clients are in [for example I am in London but I picked PST time because most of my clients are in America – many on the West Coast] – most of you probably have hyper-local businesses so you can pick your own time zone.
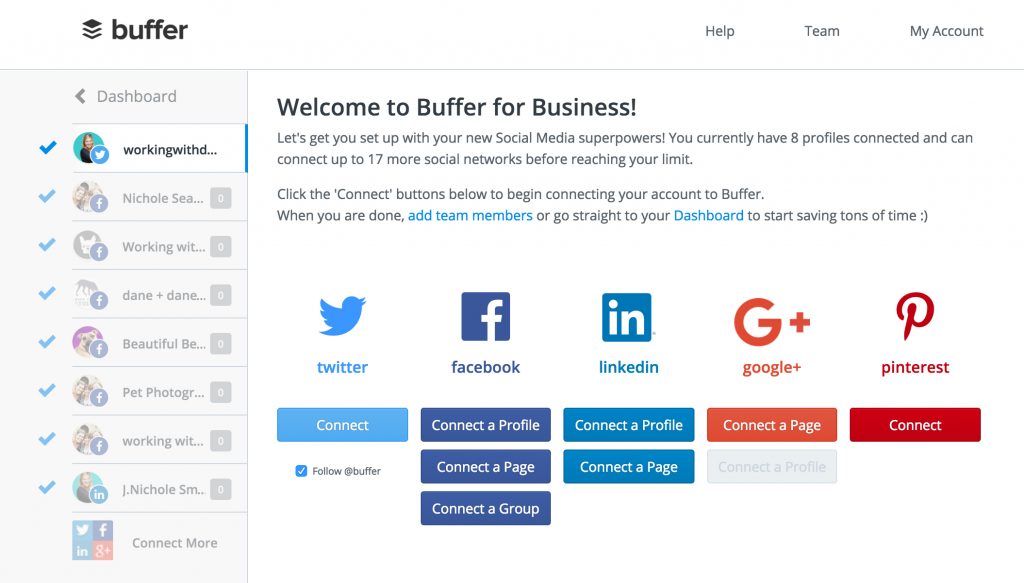
The next task is to connect your channels.
At the moment you can connect the following platforms to Buffer:
- Facebook [profile, page + group]
- Google +
- Pinterest*
All the options are presented in a super easy-to-follow setup when you first login. All you have to do is connect them – and if you’re logged in in your browser [which, let’s face it, you probably always are] then you don’t even have to enter any login details
*I have heard that Pinterest bases a lot of your authority in the ap on how often you login to the app natively [as opposed to pinning through apps like Buffer] so don’t do all your pinning in Buffer if Pinterest is a significant part of your strategy.
After you set up your channels, you’ll be prompted to set up the ‘Chrome Extension’ – this is like your ‘pin it’ button [but only available for Chrome].
Chrome Extension
This button lives in your browser and it is one of the very best features of the app! It allows you to click the button and automatically schedule content into buffer right from your browser [without having to open the ap]. This extension makes it super easy to add great articles or resources you come across into your social media calendar for up to a year in advance [you can post content a LOT more often on Twitter than FB because the conversation moves so quickly].
When you click on the Buffer button in Chrome, you’ll see this screen, the ‘Simple Composer’:
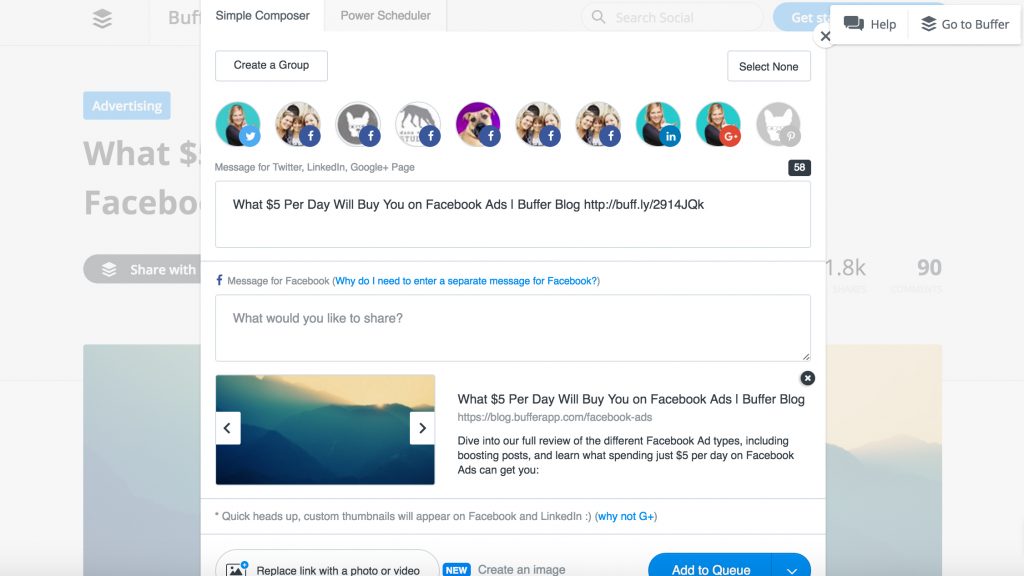
In this screen you can set one post up and ‘add it to the queue’ – It will automatically post to all the channels[the circles at the top] that are in color at the top, so if you want to exclude one, or all but one click it and it will go grey and it will not be included in the scheduling.
If you click the tab at the top for “Power Scheduler” you will see this screen:
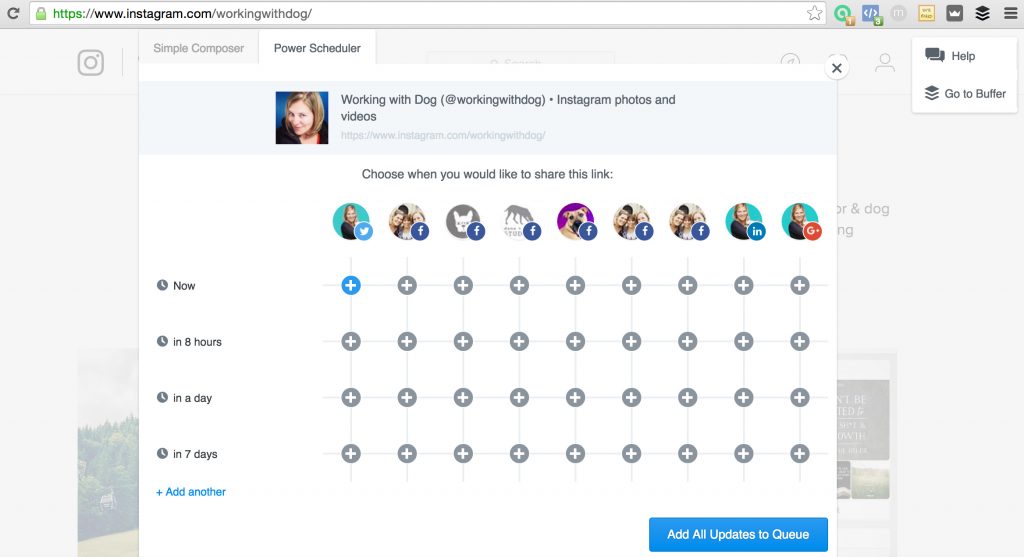
Here you can have more control over the how/when of the scheduling: multiple times on multiple channels if you want. Again, it will automatically post to all the channels that are in color, so if you want to exclude one [the circles at the top] click it and it will go grey.
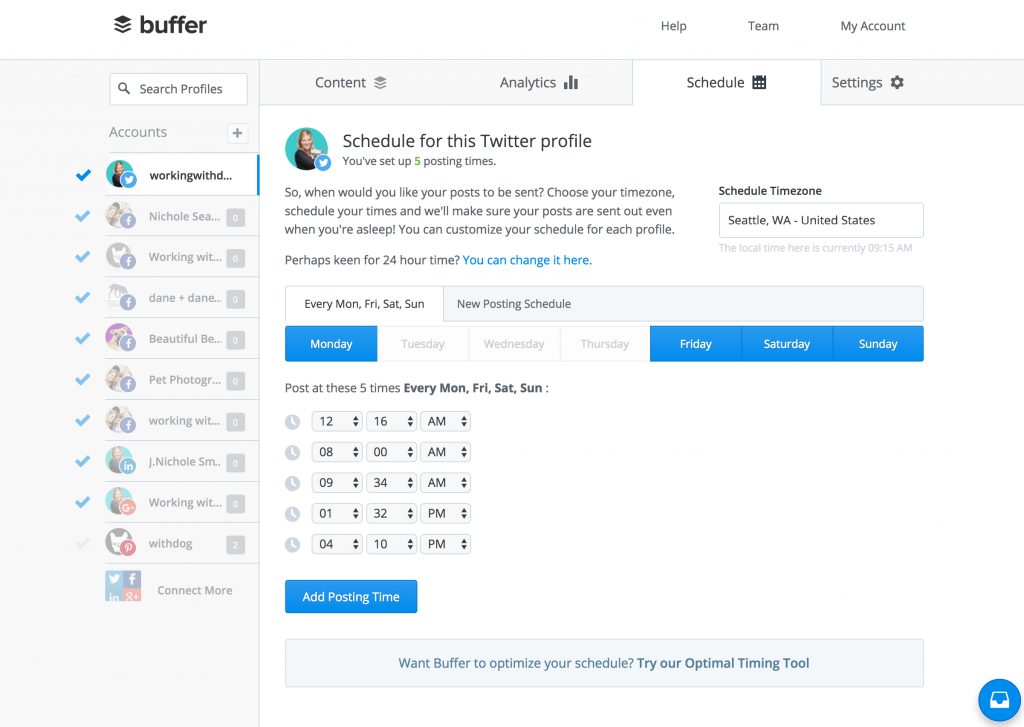
Schedule
Okie doke – next in line is to choose a schedule for your content. This is easy too – because Buffer makes suggestions for you based on your timezone + the specific channel. Just click the button on the bottom that says “Try Optimal Timing Tool” and it will allow you to override your existing schedule based on how many times a day you’d like to post. Don’t forget to do this for each channel – just click the next one down on the left hand side-bar to do the next one!
Content
When you click back over to ‘content’ tab on the top, you’ll see blank spaces awaiting your creative genius! Yay now the fun part.
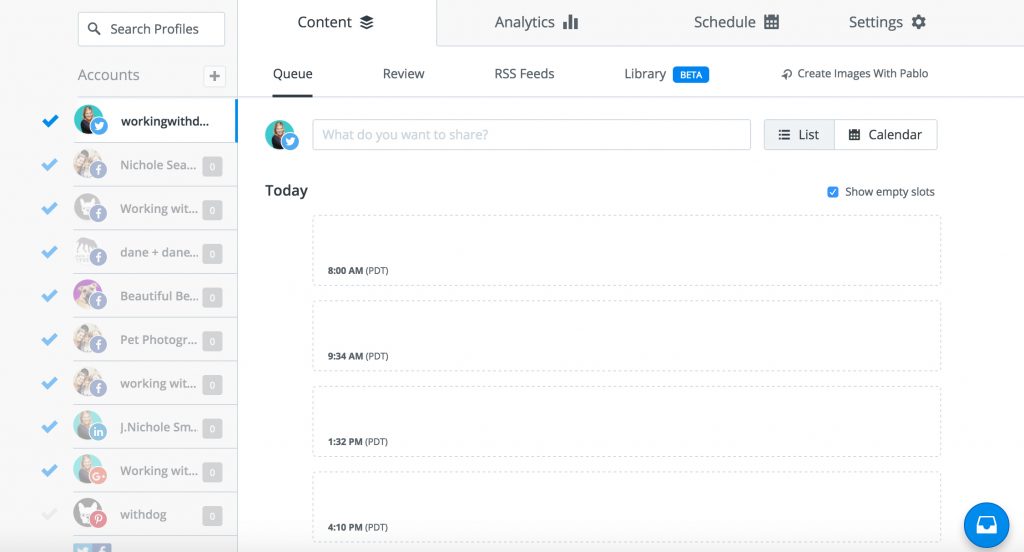
To start, just start! You can always add more later – and you can always post natively in Twitter, Facebook etc. – so this is just your foundation of content…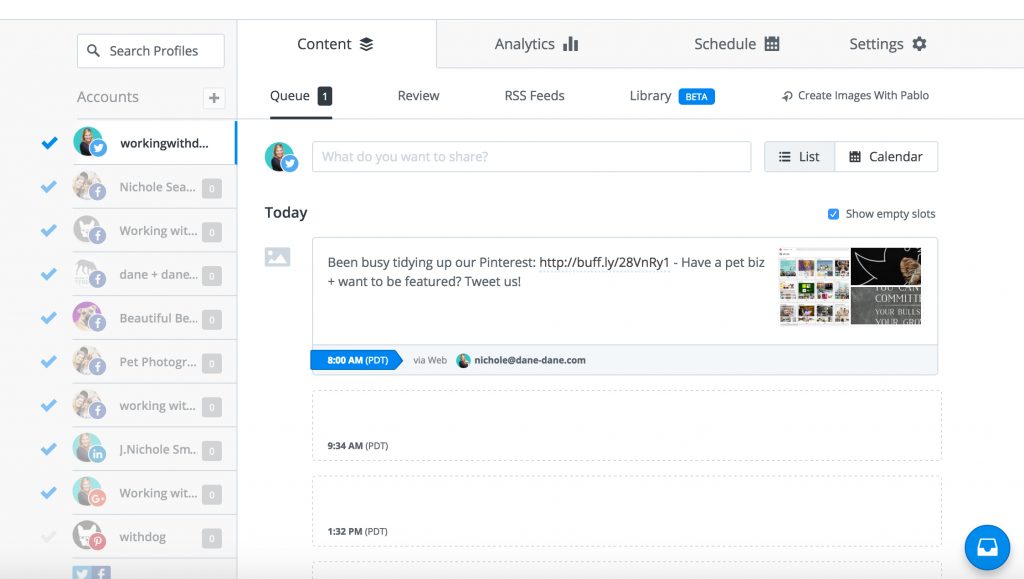
How you handle the content-creation for your social media is entirely up to you – but here’s some tips:
- Have some regular, repeatable things you do – like #tongueouttuesday or #tbt [throwback thursday] – we do #workingwithdogwednesday and #sofluffyfriday plus the occasional #fbf [flashback friday]
- Come up with your own proprietary hashtags – we use #doglywisdom and share the same quotes that we use on instagram [if you use quotes from people who are still alive don’t forget to see if they’re on twitter + include their twitter handle!] We also use #petpreneur #workingwithdog #withdog and #marketinggenius – some are more ‘ours’ than others. But it’s nice to have a bit of consistency and nice to have this to pull out of your pocket when you can’t think of anything.
- Keep a Dropbox of images from Instagram or your from your phone [they don’t need to be fancy or pro – just interesting] and use them as inspiration if you can’t think of anything. Remember tweets with images attached get more attention so try to include as many as possible! Try asking simple questions to your audience like ‘coffee or tea’ – things that will spark a quick tweet back.
- Hug an influencer. Reading a book you love? Tweet about it! Quote them or say how much you’re loving it and be sure to include the author’s twitter handle. They will probably retweet it if they see it!
- Look at the calendar! When you’re scheduling in advance it’s easy to get your days mixed up – but be sure to hit the major holidays with appropriate content [visually and content-wise]
- Share your own dog with funny quotes, caption-this or commentary on being a dog owner. It’s easy and it’s gone so fast on twitter it won’t seem like the ‘me me me’ show – but max once a day, OK?
- Plug your other channels. Give people a reason to hop over to Pinterest or Instagram
- Most important of all [but only about 20% of the time] Tweet promotions, sales, offers or even better, valuable CONTENT that will lead the person on to a sale or promotion – like a blog post with a roundup of products or your OPT-IN so you can snag their email. Don’t skip this one because this is how you’re like to actually get some conversions.
- If you need some visual assistance, open ‘Pablo’ [You’ll see the link in the content screen] this is an application like Canva that will allow you to design some quick artwork to include with your post. I love the ‘sizes’ guide at the top right which will help you know what aspect-ratio is best for each platform. You can use their stock images or upload one of your own!

Re-buffer
Once you’ve had a few things go out – pop over to the analytics tab and you’ll see a screen that looks like this:

Click the ‘Re-Buffer’ Button and you’ll see this:
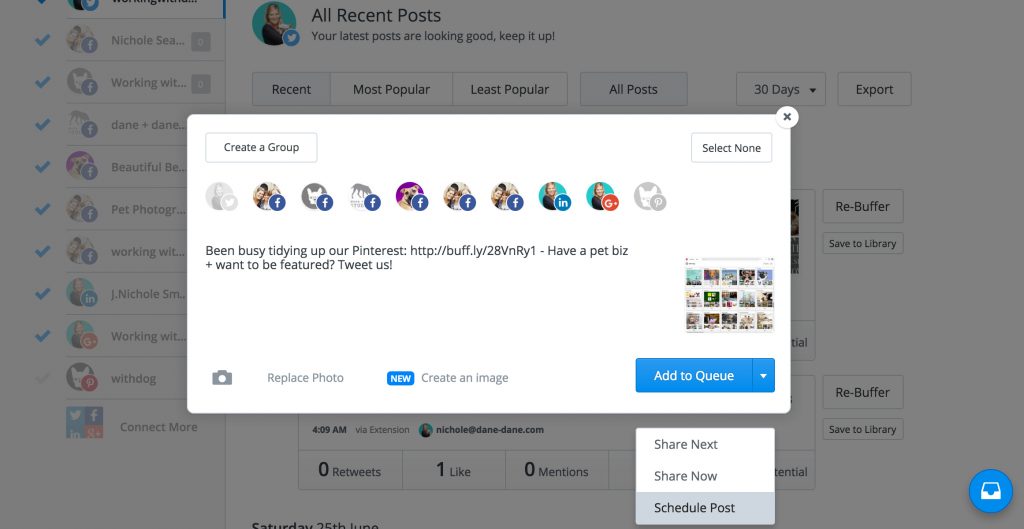
Here you can choose to ‘Add to Queue’ or if you want more control, click the down-arrow to the right and you can ‘Schedule Post’:
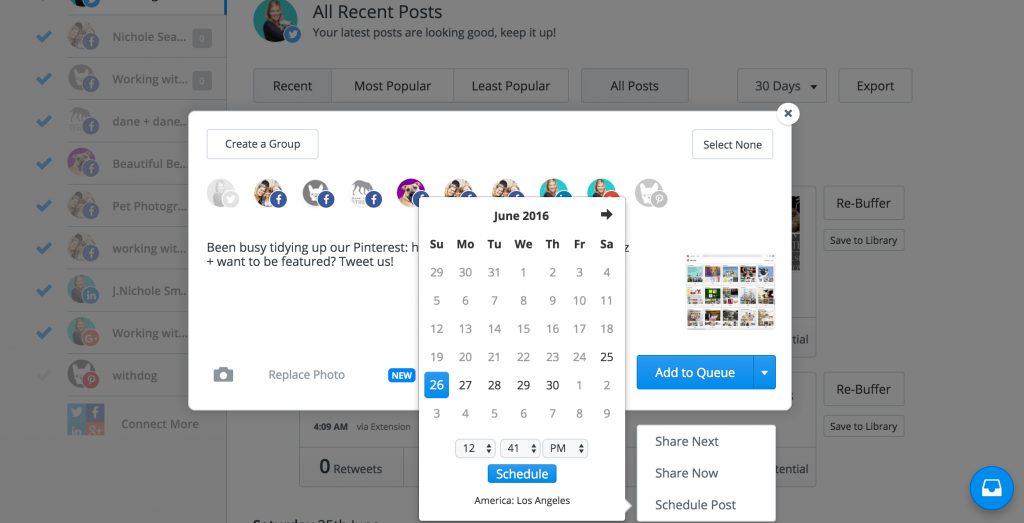
Use this tool to re-share some of your most effective content – on Facebook schedule it for a time way in the future, or on Twitter schedule it again and again!
BONUS NOTE:
Rumor is that Buffer will be adding Instagram integration very, very soon now!
Also, here is a link to some of Buffer’s own tips for crushing it on social.
Other Apps You Need:
To help you with your Buffer you’re going to need these two apps [ideally on your phone + computer]
Dropbox
Dropbox is my go-to app for making my Instagram strategy manageable. I drop the images I want to post on Insta from my computer and then use the app on my phone to save + post them. This works the same way for Buffer – giving you access to tons and tons of content at your fingertips whenever you need it.
IFTT
If This Then That will allow you to streamline the work you put in. Basically IFTT stands for “If This Then That” and it allows you to set up ‘triggers’ [if] and ‘actions’ [that] – For example if you post a photo in Instagram, for example, you can set up an IFTTT ‘recipe’ to have that image post to Twitter [which is better than having it auto-load to twitter from instagram, because when you do that the image shows up as a link in Twitter instead of a photo]. There is an ENDLESS number of recipes you can use to connect your apps / channels / platforms together – so dig in and get familiar and set up at least one recipe that will help you double-up on your scheduling / posting efforts!
Followerwonk
This is where stuff gets a bit geeky… but if you’re really invested in understanding your audience on social [especially Twitter] Followerwonk is an incredible tool for scraping data like bio information and timing for engagement. It’s quite pricey – but you can just sign up for a month at a time – get the data you need and then cancel your subscription.
Ready, Set, Buffer!
Now your challenge is to go to Buffer right now and at least create a login, have a look around, and download that Chrome Extension [so the next time you see something brilliant it’s easy to save + share]- then set a time in your calendar to come back and schedule some content.
If you plan to do this weekly for about two weeks at a time – it will probably take about two hours, maybe three if you make it super juicy and visual and detailed on several platforms – but it will be a LOT faster than trying to keep up with your channels every day on each platform.
Give it a go and we’d love to hear what you think and how it’s working for you over on the Working with Dog Facebook Page, or on Instagram, Twitter or Pinterest!